


This is the follow-up to my EPIA-800 build log.
Read First: https://theclassicgeek.blogspot.com/2023/03/mini-itx-windows-95dos-build-with-epia.html

NOTE: Videos in this post may need to be manually set to 720P.
As I mentioned in the original post, I decided to run Windows 95C OSR 2.5 on this build for a few reasons, even with its limitations over Windows 98. First off, this board isn’t going to be powerful enough on its own to play games made for Windows 98 and later all that well, so I knew I would be primarily sticking to games made in 1998 or earlier. Second, Windows 98 didn’t offer anything I wanted that I couldn’t get on Windows 95, with one exception that I will discuss below. Lastly, I simply wanted this machine to run Windows 95 to fit my own personal vision for the system.
From this point on, I assume that if you’re doing a build like this, you already know how to install Windows 95 and set it up how you like it. I didn’t have many issues setting up and configuring Win95 on this system, but it’s a process I’m very familiar with. If you’re having issues, there are a ton of resources that can be found with a few simple Google searches that should get you up and running. I also linked to all the necessary hardware drivers and information you should need for the EPIA-800 in the original post.

Some of Windows 95’s limitations in comparison to Windows 98 can be pretty easily overcome, as was the case with the few limitations that mattered to me for this build. The first being USB support, thankfully Windows 95 OSR 2.5 adds basic USB support that I can use for file transfers. Another Windows 95 limitation is the 32GB disk size limit. Again, that’s easy to work around since you can simply partition out larger drives into 32GB segments if you want more storage space, and that’s what I did with this build.
The biggest hurdle I ran into with using Windows 95 on this board is the fact the EPIA-800 lacks a standard 15-pin game port, so using a controller from that era can’t be easily done out of the box. Getting USB controllers running on Windows 95 is sketchy at best, if at all. I had no luck getting anything I had on hand to work, even though HID capable USB support exists in Windows 95 OSR 2.5, controllers would require special drivers that I am not sure even exist since USB controllers really didn’t become a thing until Windows 98 was released. If I was running Windows 98, using USB controllers wouldn’t be a problem.
So, I was left with four choices, add a sound card with a game port, something I wasn’t going to do since it would kill the very idea of the build. The next was to use an alternative type of controller, something that does not use the 15-pin game port. Another is to use some sort of external game port adapter that works with Windows 95. The last option was, don’t use a controller for anything at all, and I really didn’t want to give up using a controller.
One last self-imposed limitation is physical size, since I want to keep this build as small as physically possibly, that means no CD-ROM or floppy drive. Not having a floppy drive isn’t a big deal since most software you would want that came on floppy is available to download somewhere online anyway. The bigger issue for gaming is how to use CD based games without a CD-ROM drive.
So, how are we going to solve these problems? Let’s start with the easy ones, those that can be solved with software.

To address the lack of a CD-ROM drive, the simple solution is to use disk images, and thankfully a tried-and-true piece of old software solves that problem very nicely, Daemon Tools. With DT you can mount common disk images to a virtual drive and install and play them as needed. The only downside is storing all the disk images, but 128GB of total storage is a ton of space on an old system like this, in addition to external USB stroage.
Daemon Tools version 3.46 is what I personally use for handling CD-ROM images. It runs great in Windows 95C and has most of the emulation options and image support you’re going to need for a majority of CD-ROMs of the era.
You can download Daemon Tools from here: http://www.oldversion.com/windows/daemon-tools-3-46
If you need to convert images to a format compatible with Daemon Tools 3.46, AnyBurn is a great free tool that can convert many different common image types using a modern PC.
You can download AnyBurn from here: https://www.anyburn.com/
One last piece of must have software on Windows 95 is WinZip, unlike modern versions of Windows, it does not natively have the ability to read ZIP files. Unpacking RAR files will need to be done on a modern machine before transferring them to the Windows 95 system or repacking them in a ZIP for use on the older machine later.
You can download WinZip from here: https://winworldpc.com/product/winzip/70

Of all the options I spoke about above, there are really only two that are viable for my build, and I decided to try both and see what I could get to work, what I would like the most, and to try and make it easier for anyone else who may want to do a build like this in the future, however slim that chance may be.
The first option was to try and track down the only serial-based controller I knew of and see if it was obtainable at a reasonable price. The Gravis “Stinger” is a special controller that was originally designed for use with Windows 95/98 laptops since they lacked built-in game ports. The Stinger has a few different operating modes that I will discuss below. Thankfully, at the time I was working on this build, I was able to find two of them for sale on-line, new in the box! One was on Poshmark of all places, for just $26! So, I ordered it, only to be contacted by the seller about a week later saying it was broken when it fell from a top shelf and they had to refund me. Thankfully, the second Stinger that I found for sale was still available, all be it on yet another site I’ve never used before, Mercai, and this time the sale went through and I got the gamepad without any problems!

I will admit, I was never a fan of the Stinger’s design, I was far more accustomed to the SNES style Gravis and InterAct controllers of the time, and they were far more comfortable in my hands. However, we’re still going to give it a go and see how well it works with this setup. I may be pleasantly surprised since I’ve never actually used one.
The second option is to use an adapter, specifically a device called the “Rockfire RM-203”, a game port to USB adapter, otherwise known as the “USB Nest”. Supposedly, this handy little thing was originally made to be used with Windows 95, and still works to this day on modern operating systems allowing you to use classic game port controllers on modern systems. Thankfully, it seems they may still be getting made in China, or perhaps they are just new-old stock, but they are available on sites like eBay, Amazon, and AliExpress. So, I picked one up on Amazon for under $25.

The Rockfire seems like it would be the best option for me since it works with most game port controllers. Listings says they've been made since back in the mid 90’s, and my aging memory seems to recall people using these with Windows back then, but there is conflicting information online about its ability to work with Windows 95 today, so that’s what I wanted to find out.
The last thing I needed was a proper classic game port controller to use with the USB Nest, and that pretty much came down to my two favorites of the era. The SNES style 4 button Gravis PC Gamepad and the InterAct PC Propad 4. In the end I went with the InterAct Propad 4 simple because I remember it being a bit more comfortable in my hands than the Gravis PC Gamepad since it was an overall larger controller. I was able to pick up a near mint one on eBay for just $15. Once I had everything in hand, it was time to test it all out and see what worked and what I preferred.


I’m going to start with the USB Nest simply because it was the most infuriating. First off, the RM-203 is recognized by Windows 95 4.0095C, but only as an unknown device, and no drivers exist for it, so I had no way of getting Windows 95 to recognize it as an HID device or game controller. In fact, it simply locked up Windows more often than it was recognized, sending me down a rabbit hole trying to see if I could get it working.
The infuriating part is there are 2 manuals available for this thing floating around online, one says it works in Windows 95, the other makes no mention of Windows 95, just Windows 98 and higher. There is also a lot of conflicting information on its Windows 95 compatibility floating around on the sites I’ve found that talk about it. So, I’m wondering if there were two versions made, or the manual that says if works with Win 95 was just wrong, was later revised, leading to the confusion.
Many sources say the RM-203 was originally made in or around 1993, I find it odd that it would not have support for Windows 95, but this is a USB adapter, and USB wasn’t produced until 1996. The only source of the 1993 date is printed on the included manuals, no date is listed anywhere on the box or on the PCB inside. The internals are all SMD components, so that’s not a lot of help since most of the devices out there today could simply be reproductions and SMD dominated much of the consumer electronics market by the mid to late 90’s. The RM-203 is still widely available but all of the newer listings for them state they’re meant for use on Windows 98 or later only and are intended to allow people to use older gameport joysticks and gamepads on modern hardware that has no gameport, and that makes much more sense.
It's all very confusing and leads me to suspect some of the information on these devices claiming they were made in 1993 and work with Windows 95 is simply incorrect. Especially when they work with Windows 98 and later perfectly. I tested the USB Nest on Windows 98SE, Windows XP, and Windows 10 and it worked flawlessly every time.
Still, I wasn’t ready to give up without a fight and decided to ask around online on various retro forums and see what I could find out what I may not have known based on what I could find via Google. The responses I got confirmed my suspicions, that the USB Nest Rockfire RM-203 was made much later than 1993 and does not appear to work with Windows 95 since it would require a driver that also does not seem to exist.
Of course, there is the small possibility that it simply does not work with my specific setup, but I doubt it. Windows 95 USB support is primarily centered around removable storage, and in that respect it works great. I can transfer files back and forth using a FAT32 formatted 32GB flash drive all day and it works flawlessly. So, with that, I abandoned the RM-203 for this build and left it connected to my modern PC so I could still use my PC Pro Pad on emulators and virtual machines. I moved on to something I know full well is designed for Windows 95!

My last practical option for a gamepad on this system, the COM port driven Gravis Stinger Laptop Gamepad, is what I looked at next. It was designed and built to work with Windows 95 and 98 powered laptops that lacked a gameport, and just like the EPIA-800, most still had a COM port. As I said above, the Stinger a few different operating modes, it can act as a gamepad, joystick, or mouse. Inputs can be read as normal DirectX inputs, or you can map keystrokes to the buttons for use with games that don’t support Direct Input. It also comes with working drivers and software for Windows 95/98 that allow you to configure however you like, as well as store multiple profiles for different games. It’s actually quite impressive for the time.
The other big shocker for me was the gamepad itself, not only was it smaller than I expected, but the D-Pad is very similar in feel to that of the stick on an N64 controller and surprisingly easy to use. The smaller size worried me for a moment, until I actually started using it and was pleasantly surprised to find it quite comfortable and easy to use, even in my big hands.
It was very easy to setup and use and it worked flawlessly in all the games I tested and wanted to use a controller with. I love it when something I wasn’t expecting to like actually turns out to be so much better, and that’s exactly who I feel about the Gravis Stinger. It’s software configurability means it supports a wide range of games, and even DOS games if you run them in a Windows shell. I’m just glad I was able to get my hands on one, and a new one at that, as they seem to be somewhat rare.


Once I had the controller situation
sorted out, it was time to dive into some real game testing and see
what games that I’m interested in will actually be playable on the
system. I’m happy to say that all the DOS games I tried ran exactly
as they were supposed to on this system. Duke Nukem 3D Atomic
Edition, Quake, High Octane, and more, all ran fine, as expected, as well
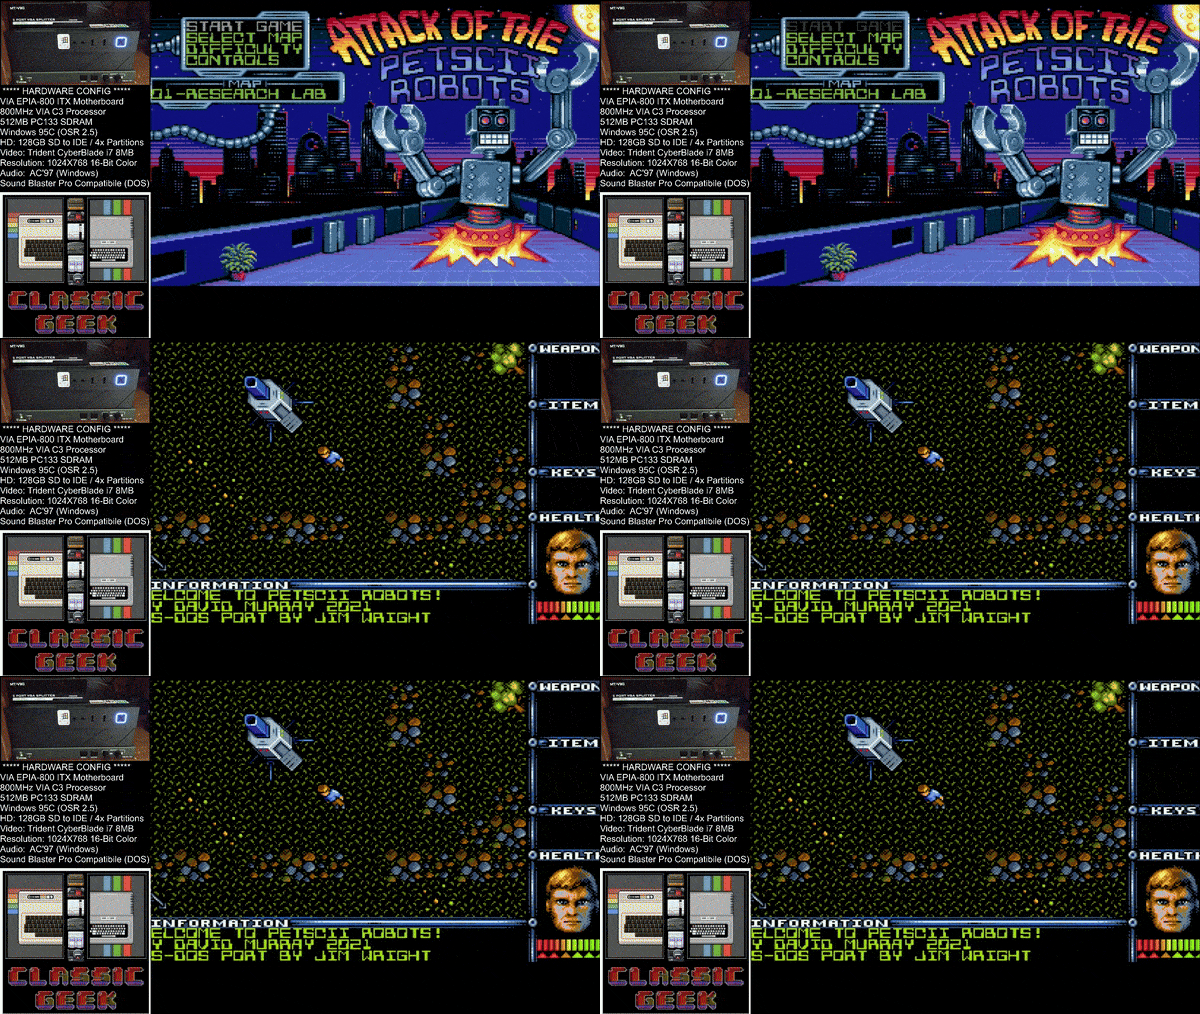
as David Murry's modern Attack of the PETSCII Robots. Not many DOS
games are going to stress this system. Here is a short video of Duke
Nukem running so you can see it handles DOS games just fine, and the
SB Pro emulation in action, as well as a GIF of PETSCII Robots!
The real test was what would be playable in Windows 95, and I was pleasantly surprised with the results. I will list all of the games that I personally have installed and play on this build, and every one of those games is fully playable, but I wanted to show a few of the most common and a couple of the most demanding games so you can see the upper end of what the EPIA-800 board can play without a dedicated video card, just on the integrated Cyberblade i7 GPU.
Note: For an FPS overlay, I’m using the classic Fraps software.
You can download a copy of Fraps for Windows 95 here: https://web.archive.org/web/20000301110441/http://www.fraps.com/download.htm
Unless otherwise noted, all of the games are being played at 640x480 or 800x600 and their “default” settings, but I'm currently running the desktop resolution at 1024x768 16-bit High Color. Any video is being up-scaled using an Extron RGB-DVI-300 to 720P and captured on a StarTech DVI USB 3.0 capture device for recording.
Performance in 3D games on the integrated CyberBlade i7 will vary from game to game, but most of the games I've tested play well at 640x480, and others do good at 800x600. I won't be messing with 1024x768 all that much since it's going to be more than this board can handle in most 3D games.
Some references to the CyberBlade i7 integrated video chip that I can found online say its 3D performance is somewhere between a Voodoo 1 and 2, but I think that's optimistic at best, as a dedicated Voodoo 1 would probably outpace the CyberBlade is most games in my opinion. Still, it performed well enough for me to enjoy most of the 3D games I wanted to play on this system, and all of the DOS and non-3D titles.
The first Windows game I had to try was Doom 95. Doom 95 maxes out at 640x480, so that's where I set it. The biggest hindrance for me playing Doom 95 is trying to use the mouse since it reads both the X and Y axis for movement, meaning if you move the mouse forward and backwards, it overrides your presses and moved you forward and backwards, and you can see me struggle with that as I try and record the video. Beyond that, the game runs and plays great! It goes without saying, but the DOS version also runs great.
Next, I wanted to try a few 3D shooter games that were a bit more demanding, so I tried the original Half Life, Blood II: The Chosen, and Quake II. They are all perfectly playable, Half Life runs well at 640x480, as does Blood 2.
In fact, Half Life at 640x480 runs best in GL mode, while running through Anomalous Materials you see the FPS counter hit 60 and the lowest dips I seen were in the mid 20's, but rare. At 800x600 it dances between 20 and 40 FPS. Fraps don't seem to like DX mode, but it felt perfectly playable. Don't bother with software rendering, you're lucky to break 20FPS.
Blood 2 is best played at 640x480, netting you 20-40 FPS on average while running through the train and station. Again, software rendering is a slideshow and best avoided.
Quake 2 runs great at 640x480 and can even do 800x600! Better at 640x480 obviously, and frame rates will dance all over the place, but without Fraps running, I would have been hard pressed to notice. Here is a short clip of Quake 2 running at 640x480 followed by 800x600.
While I really didn't build this machine for early 3D shooters, but more for a wide variety of other games, it's nice to see what it can do out of the box with no dedicated graphics card. You can always play with the available settings to boost frame rates, just like we had to do back in the 90's and even today. By modern standards, "playable" means something completely different than what it did back in the 90's, at least to this old geek it does. If it "feels" good, then it's playable in my opinion.
After that I decided to try one of my
favorite racing games of the era, Wipeout XL. I spent many hours
playing Wipeout across multiple platforms and it remains one of my
classic favorites to this day. Again, it plays good on the EPIA-800 at 640x480, but 800x600 is also perfectly playable. In both resolutions it likes to hover around 25-30 FPS.
A couple other games I tested were Mechwarrior 3 and Twisted Metal 2. TM2 runs at a solid and smooth 25-30 FPS in both 640x480 and 800x600. at high details. While MW3 runs good in high details at 800x600, hovering around 25-30 FPS on average.
Lastly, I wanted to try a couple non-3D games that I spent countless hours playing back in the mid and late 90’s. Command and Conquer (Gold for Win95), Red Alert, and Roller Coaster Tycoon. They both run great on the EPIA-800. Roller Coaster Tycoon even runs perfectly at 1024x768, as seen below!

I suspect most 2D, Adventure. RPG, and RTS games of the era will have no problems at 800x600, and even 1024x768 if it's supported. It's Windows 3D/FPS games where you're going to have to make the most sacrifices for better performance. In fact, here are many of the games I have tested and have found to play perfectly fine.


I have to admit, I wasn’t sure how well this build was going to turn out in terms of performance, but I wanted to give it the best possible chance and I kept my expectations low. I’ve never been a fan of integrated graphics, so I wasn’t sure what to expect from this system. I knew what I wanted it to do, I did my best to set it up to so it would have the best chance, mainly limiting my max resolution to 800x600 for performance and using 16-bit color for maximum game compatibility. I could overclock the board, but to be completely honest I don’t see the need. It’s playing the games I want to play and I doubt the performance boost would be significant enough to warrant stressing the already 20+ year old hardware.
When we talk about FPS today, 60 is
often considered the minimum, but back in the early to mid 90’s, it
was a very different story. A consistent 20FPS or so is deceptively
“smooth” and very playable in most games of the time. Perhaps
it’s because I’m more forgiving, having lived through that era
and wasn’t raised on the 60, 120, 144, or higher FPS numbers we
look for today. Most of the games I’ve played so far looked and
felt how I remembered them, and I found myself spending hours just
having fun playing them how most people would have enjoyed them back
then, even though I have access to many modern versions of these
games, or source ports that modernize them and blow the originals out
of the water in terms of technology and performance.
When it’s all said and done, I can honestly say I am very pleased with how this build turned out. The performance, the overall aesthetic, and the build itself was just fun to do and share. I see a lot of really cool Winnows 95/98 based retro builds that focus on getting as much performance out of them as possible, and I had a build like that myself up until a few years ago, but I really don’t see a lot of minimalist retro builds, and that’s really what I wanted to do.
The EPIA-800 is a neat board and a small piece of computing history, being one of the first two ITX boards released. It’s got plenty of limitations, and there are definitely much better performing options out there, but having to work within this builds limitations was actually quite fun for me. I ended up with a small retro build that will provide me with many ours of entertainment, it was pretty cheap and easy to do, and it don’t take up much space at all.
On a side note, since I have a second EPIA-800 on hand, and now that I've got it working, I may do a second build in the future and drop a dedicated video card into it, just to see what it can do with more graphics horsepower. Well, if the prices of the good video cards ever come back down to earth that is!
Until the next build! Happy retro gaming and computing! Cheers!


